SpringPortal #1 - Get-ting started with Spring Boot
Starting with Spring Boot using VS Code
Why another Spring blog?
Spring is one of the most popular frameworks to build web applications using Java and there are tons of excellent guides & blogs online to get one started with it.
So, why this new blog???
There are mainly two goals:
I want to document my spring journey.
I want to create short guides on various topics in the Spring framework for my future reference and help anyone who wants a concise introduction to the topic.
Availability of code from the blogs
All code from this and hopefully several upcoming blogs will be available on GitLab.
We'll use VS Code for this journey. As a first step, we will create simple GET and POST APIs in Spring.
Setting up VS Code
For creating a Spring project in VS Code, you'll need these two extensions:
Creating Spring Project in VS Code
Open VS Code terminal using
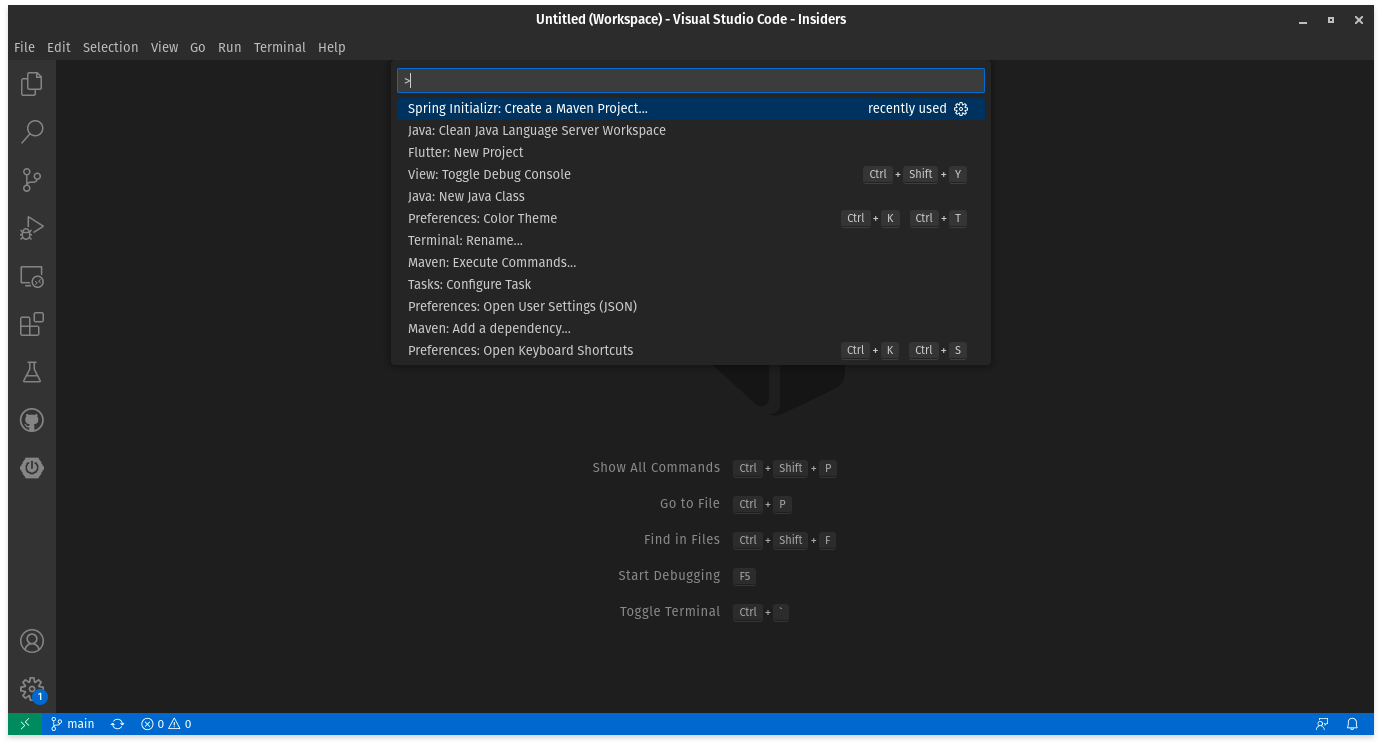
Ctrl + Shift + P.Search for "Spring Maven" and select "Spring Initializr: Create a Maven Project...".

Select the default spring version and "Java" as the project language.
Type your desired group id and you can pretty much select all the default options.
At last select the following dependencies:
Spring Boot DevTools
Spring Web
Let's code
So, we have set up all the things we need, now code.
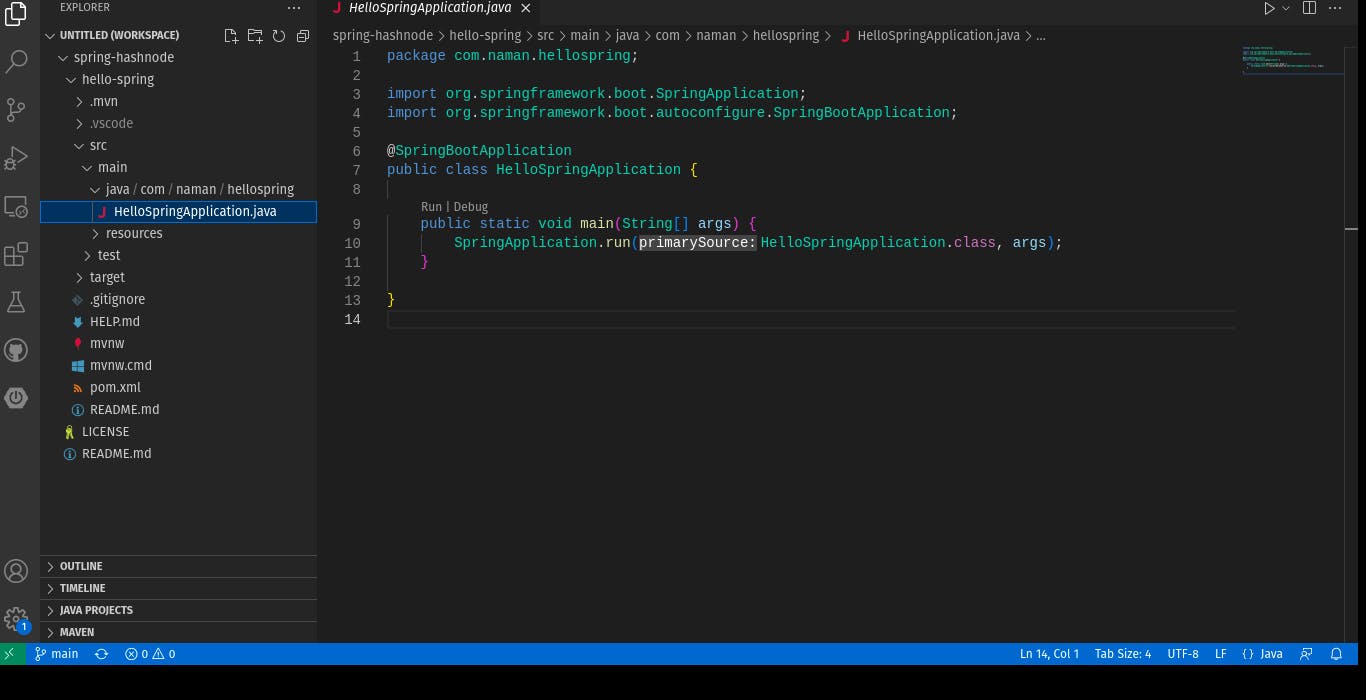
- VS Code will provide a project similar to this:

Create three folders
api,service&entityfor separating our API and Service layers and to put our entity classes.Create a Person class to use in our POST API later.
- We've used Lombok, which provides several annotations to generate constructors, getters, and setters and avoid all the boilerplate code.
package com.naman.hellospring.entity;

import java.util.Date;

import lombok.AllArgsConstructor;
import lombok.Builder;
import lombok.Data;
import lombok.NoArgsConstructor;
import lombok.ToString;

@Data
@Builder
@ToString
@NoArgsConstructor
@AllArgsConstructor
public class Person {

    Long id;

    String firstName;

    String lastName;

    Date dob;
}
- Create a
PersonServiceclass in the service package.
Business logic for an application should reside in the Service layer.
Spring provides
@Serviceannotation to indicate this layer.We'll create two methods, one to add (using POST API) and one to get data (using GET API).
Since we are not using any database, we'll log the object received and return a dummy object in the GET API.
And finally, mark the class
@Slf4jannotation to log messages in the application.
package com.naman.hellospring.service;

import java.util.Calendar;
import java.util.GregorianCalendar;

import org.springframework.stereotype.Service;

import com.naman.hellospring.entity.Person;

import lombok.extern.slf4j.Slf4j;

@Slf4j
@Service
public class PersonService {

    public Person addPerson(Person person) {
        log.info(person.toString());

        return person;
    }

    public Person getPerson() {
        return Person.builder()
            .id(1L)
            .firstName("Spring")
            .lastName("Portal")
            .dob(new GregorianCalendar(2022, Calendar.JANUARY, 1).getTime())
            .build();
    }
}
- Now to use this service class, we'll create a REST Controller to expose our APIs.
Spring provides a
@RestControllerannotation for creating restful APIs.This controller helps us to handle
GET,POST,DELETE, andPUTAPI requests.
package com.naman.hellospring.api;

import org.springframework.beans.factory.annotation.Autowired;
import org.springframework.http.ResponseEntity;
import org.springframework.web.bind.annotation.GetMapping;
import org.springframework.web.bind.annotation.PostMapping;
import org.springframework.web.bind.annotation.RequestMapping;
import org.springframework.web.bind.annotation.RestController;

import com.naman.hellospring.entity.Person;
import com.naman.hellospring.service.PersonService;

@RestController
@RequestMapping("/person")
public class PersonApi {

    @Autowired
    PersonService personService;

    @GetMapping("/get")
    public ResponseEntity<Person> getPerson() {
        return ResponseEntity.ok(personService.getPerson());
    }

    @PostMapping("/add")
    public ResponseEntity<Person> addPerson(@RequestBody Person person) {
        return ResponseEntity.ok(personService.addPerson(person));
    }
}
@RequestMappingmap the class and its methods for our HTTP requests.@GetMappingwill map the function to handle the/person/getrequest.@PostMappingwill map the function to handle the/person/addrequest.POST is an HTTP method that contains the data in its body.
ResponseEntity class allow us to set headers, body, and status for our API response.
ResponseEntity.ok(personService.getPerson())creates a response with the status code200.
Now, bringing it all together.
Install Postman for testing the APIs.
Testing POST API - Sending the data to the server and logging it to the console. -
- Testing GET API - Requesting Server for the same data.
What's next
This was a brief introduction to API creation in the Spring framework. There will be more articles in the future covering various nooks and corners of the Spring framework.
