
Photo by Rubaitul Azad on Unsplash
SpringPortal #3 - MongoDB Atlas with Spring Boot
Using MongoDB Atlas connection in MongoDB
MongoDB
MongoDB is a NoSQL database that uses JSON-like documents to map and store data from Java objects.
Spring framework provides a very intuitive way that allows effortless operability between Spring and MongoDB.
Setting up Database in MongoDB Atlas
MongoDB Atlas allows creating a free database of size 512 MB to try the Atlas. You can learn more at MongoDB Free Database.
- Create a free account on the MongoDB atlas website.
You'll see a similar screen:
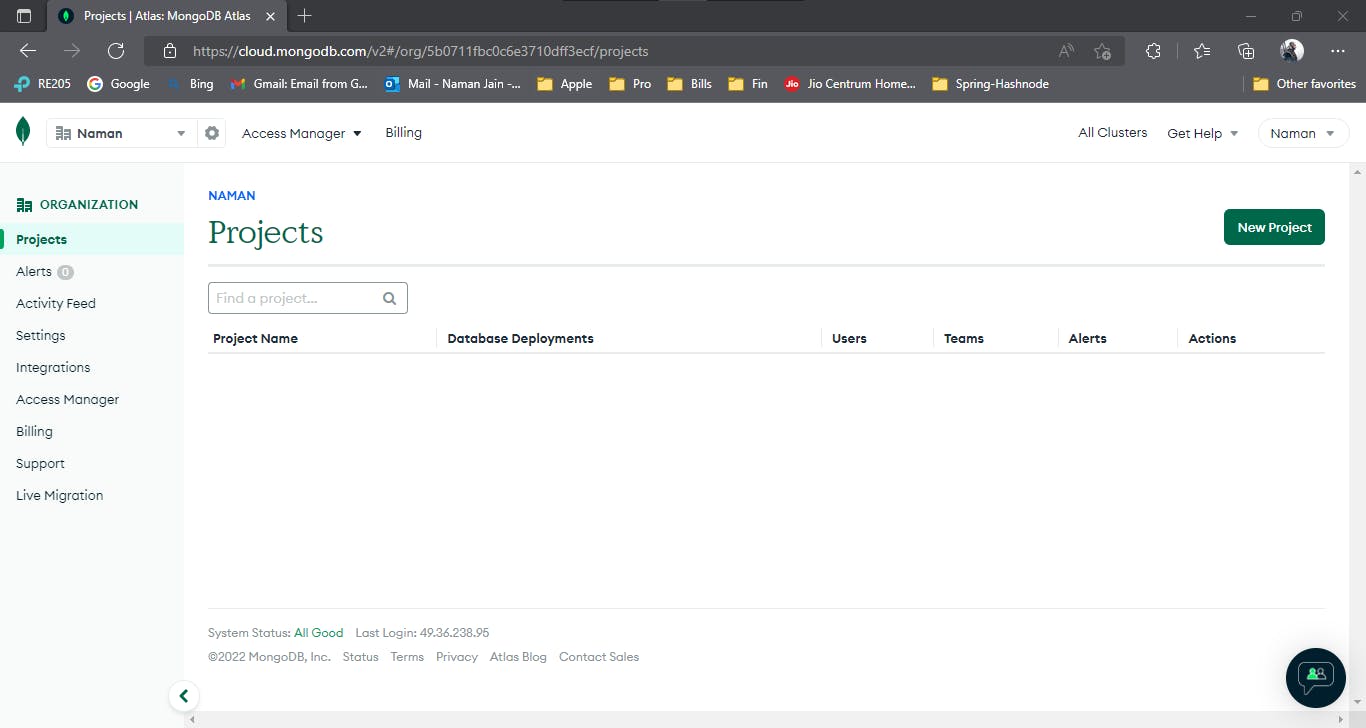
- Start a new project.
- You'll be asked for the project name and then the project owner. Select a name that you like and you can go with the default owner.
- Now, build a Database by clicking the "Build a Database" button and selecting the "Shared" cluster.
- You can now move forward with pretty much the other default values. I'm using the cluster name "SpringPortalCluster".

Now, Atlas will start provisioning your free cluster. But, still steps are left,
- Create a username & password.
- Add your current IP to the Atlas using the "Add My Current IP Address" button, which will allow only the specified IP address to connect to the cluster.
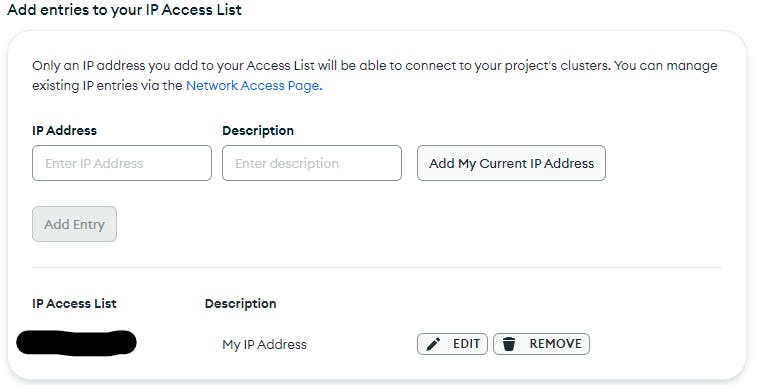
- Complete the setup and connect it using MongoDB Atlas.
- In MongoDB Atlas, create a database.
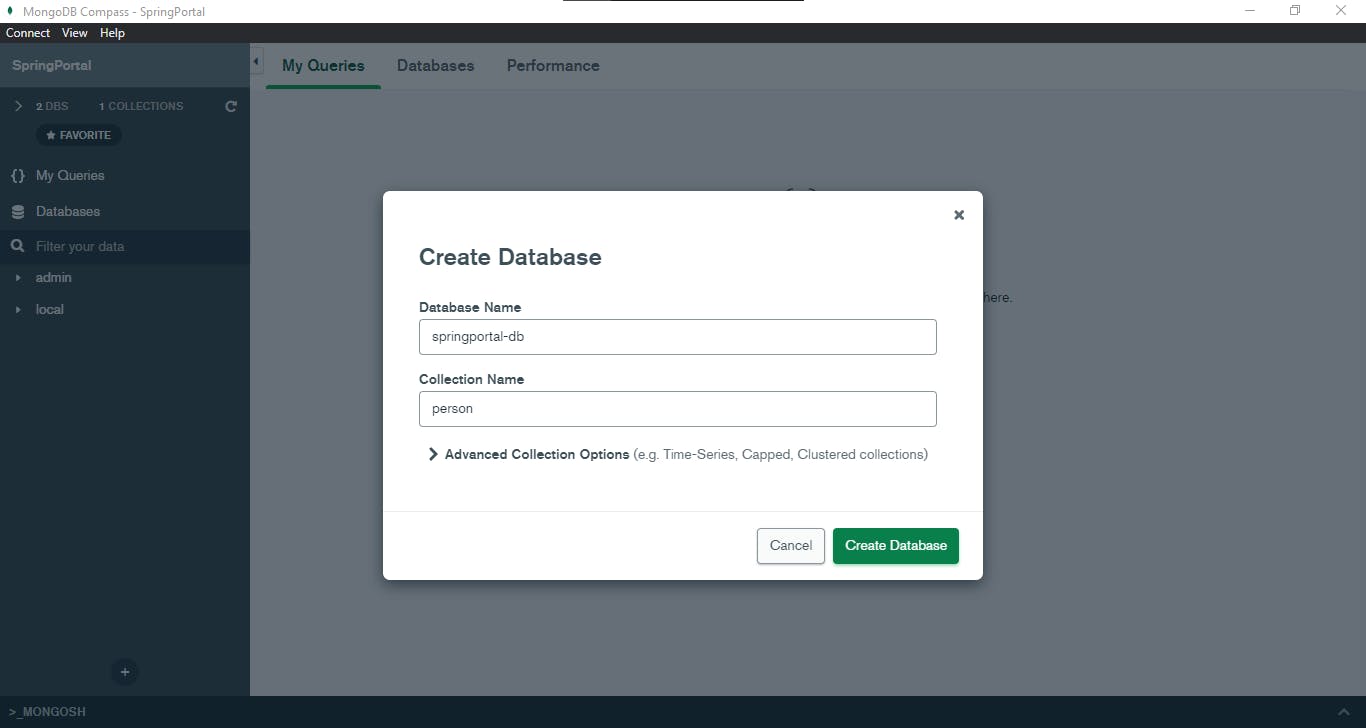
- We'll use this database and collection to connect from Spring.
- If you don't want to use MongoDB Atlas, you can also create a database locally.
Connecting MongoDB to Spring
For connecting your Spring project to MongoDB, you need to have the following dependency in your
pom.xml.<dependency> <groupId>org.springframework.boot</groupId> <artifactId>spring-boot-starter-data-mongodb</artifactId> </dependency>Add
@EnableMongoRepositoriesannotation to your application class.@SpringBootApplication @EnableMongoRepositories public class HelloSpringApplication { public static void main(String[] args) { SpringApplication.run(HelloSpringApplication.class, args); } }- Now, if you run the application, it'll try to connect to the MongoDB database but since we haven't told it the MongoDB connection string, it'll try
localhost:27017which you can use if want to try to run the MongoDB server locally. - But, since we've already created an Atlas database we want to connect to it. We need to add an
application.propertiesfile to the project's resource directory if it is already not present there. - Add the
spring.data.mongodb.uri=property,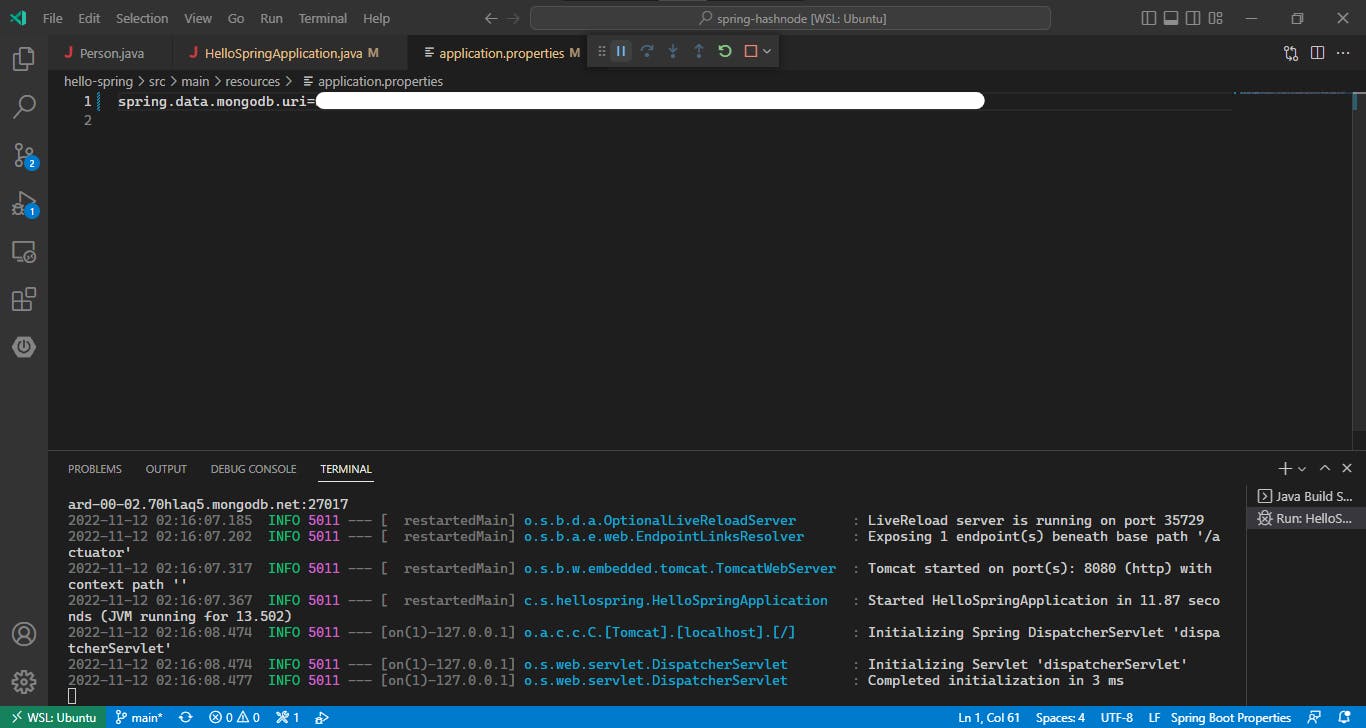
- You should be able to see the successful connection to the MongoDB server in the logs.
Coding the MongoDB support
For using MongoDB in your Spring application, you need to do the following steps:
- Declare a document class.
- Declare a MongoRepository interface.
We'll add
@Documentannotation to our Person class:@Data @Builder @ToString @Document // Identifies the object which needs to be stored in MongoDB. @NoArgsConstructor @AllArgsConstructor public class Person { @Id // @Id annotation indicates the primary key of the document Long id; String firstName; String lastName; Date dob; }Add a package named
repository.Add an interface that will extends
MongoRepository,@Repository public interface PersonRepository extends MongoRepository<Person, Long> { }- The Repository is marked with the Repository annotation which indicates that this interface supports CRUD operations.
MongoRepository<Person, Long>takes two template parameters.Persondefines the object type which will be used by Spring during JSON serialization and deserialization.Longindicates the type of ID that our object uses.
If you run the application right now and there is no error, you will see a collection created in MongoDB with the name person.
Now that we set up the repository, we can use it in the service method.
@Service public class PersonService { @Autowired private PersonRepository personRepository; public Person addPerson(Person person) { if (person.getId() == null) { person.setId(RandomUtil.generateLongId(personRepository)); } return personRepository.save(person); } public Person getPerson(long id) { return personRepository.findById(id).orElse(null); } }- We're auto-wiring our repository.
- This repo object will allow us to do various CRUD operations in MongoDB.
In the above service, we've also set the ID. Spring set the ID automatically if it is an Object or String type. But for numerical type, we need to set it explicitly.
For generating the ID, we've created a method.
public static long generateLongId(MongoRepository<?, Long> mongoRepository) {
   long id;

   do {
       id = Math.abs(new Random().nextLong());
   }
   while (id != 0 || mongoRepository.existsById(id));

   return id;
}
Now we just need to update our controller.
@RestController
@RequestMapping("/person")
public class PersonApi {

   @Autowired
   PersonService personService;

   @PostMapping("/add")
   public ResponseEntity<Person> addPerson(@RequestBody Person person) {
       return ResponseEntity.ok(personService.addPerson(person));
   }

   @GetMapping("/get")
   public ResponseEntity<Person> getPerson(@RequestParam Long id) {
       Person requestPerson = personService.getPerson(id);

       if (requestPerson == null) {
           // this will return a 404 response.
           return ResponseEntity.notFound().build();
       }

       return ResponseEntity.ok(requestPerson);
   }
}
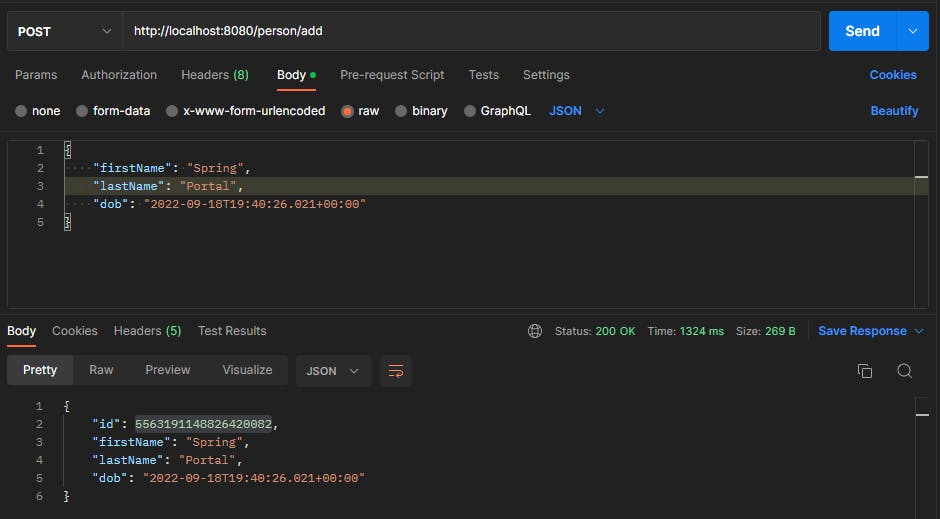
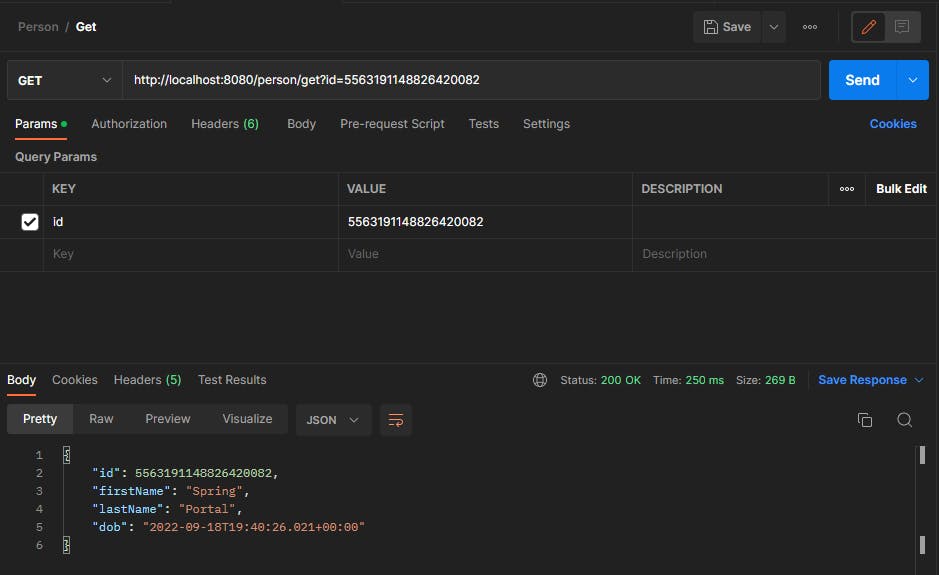
Bringing it all together
Adding a person
Getting the person
Entry can also be viewed in MongoDB compass:

